I don't think so, Tim.
My Dad, the honorable David Earl Clark, is from a generation when men were men and when things broke around the house you picked up your tool box (or tool belt) and fixed it. If the sink was leaking you pulled your pants down to allow your butt crack to show, grabbed a wrench, and fixed the leak. If you needed a new roof, you grabbed some shingles, a hammer, and some nails then replaced the roof (after hitting your thumb three or four hundred times). If your TV stopped working you grabbed a screwdriver and opened the back of the massive box as if you somehow understood how a TV works then proceeded to shock yourself 7 or 8 times before reattaching that loose wire. When things would break you would fix it.
Times have certainly changed for those of my generation. The most powerful weapon in the toolbox of most people my age or younger is the cellular telephone. No matter the problem, men and women of my age are more likely to call someone to fix it rather than fixing it on their own. This is creating a society of people that can't handle the smallest problems without calling someone to fix it for them.
I'm as guilty as the next person of this personality flaw. I always seem to break down a bit whenever something goes wrong with my car. The stress will start to overwhelm me and it takes a bit of time before I regain my composure and get on the phone to call for assistance. This is a flaw that I have and I'm working really hard to correct. With that in mind I thought I'd share some of the handy projects I've been able to complete, all on my own, with glaring success. Please don't think of this as bragging because the three projects I'm about to share with you pale in comparison to those of generations before me but they are my attempts at being more self-sufficient.
Cabinet Brackets
My cousin was kind enough to give us two sets of cabinets to use for in Cece's playroom/bedroom to hold toys, books, diapers, and everything else you can imagine. Each cabinet comes in two pieces; the bottom drawer and the top cabinet that is designed to hold four baskets. The pieces were held together by two brackets in the back of the cabinet to keep the top from sliding around. When we first got these we took them apart so the cabinets were separate from the baskets.
Recently we reorganized the playroom and Cece's bedroom to make room for all the new toys that she received for Christmas and to get rid of some of the older toys she no longer used. As part of the reorganization we decided to reattach the pieces so they could be used as one big unit. Unfortunately for me I had no idea where the brackets were to hold the two pieces together. Without these brackets the top would slide off the bottom with easy creating a real danger.
Being the beginner handyman that I am, I came up with a plan to use some scrap lumber that the previous owner of our house left in the garage and screw them into the back of the cabinets to hold them tight. It wasn't a perfect fit so I had to drill some starter holes for the screws and cut the wood down to the correct size but at the end of the day I got the job done. From the back the pieces look a bit messy, but the back is up against a wall where no one will every see the make-shift brackets and the cabinets now are in perfect working order.

Close up shot of the bracket
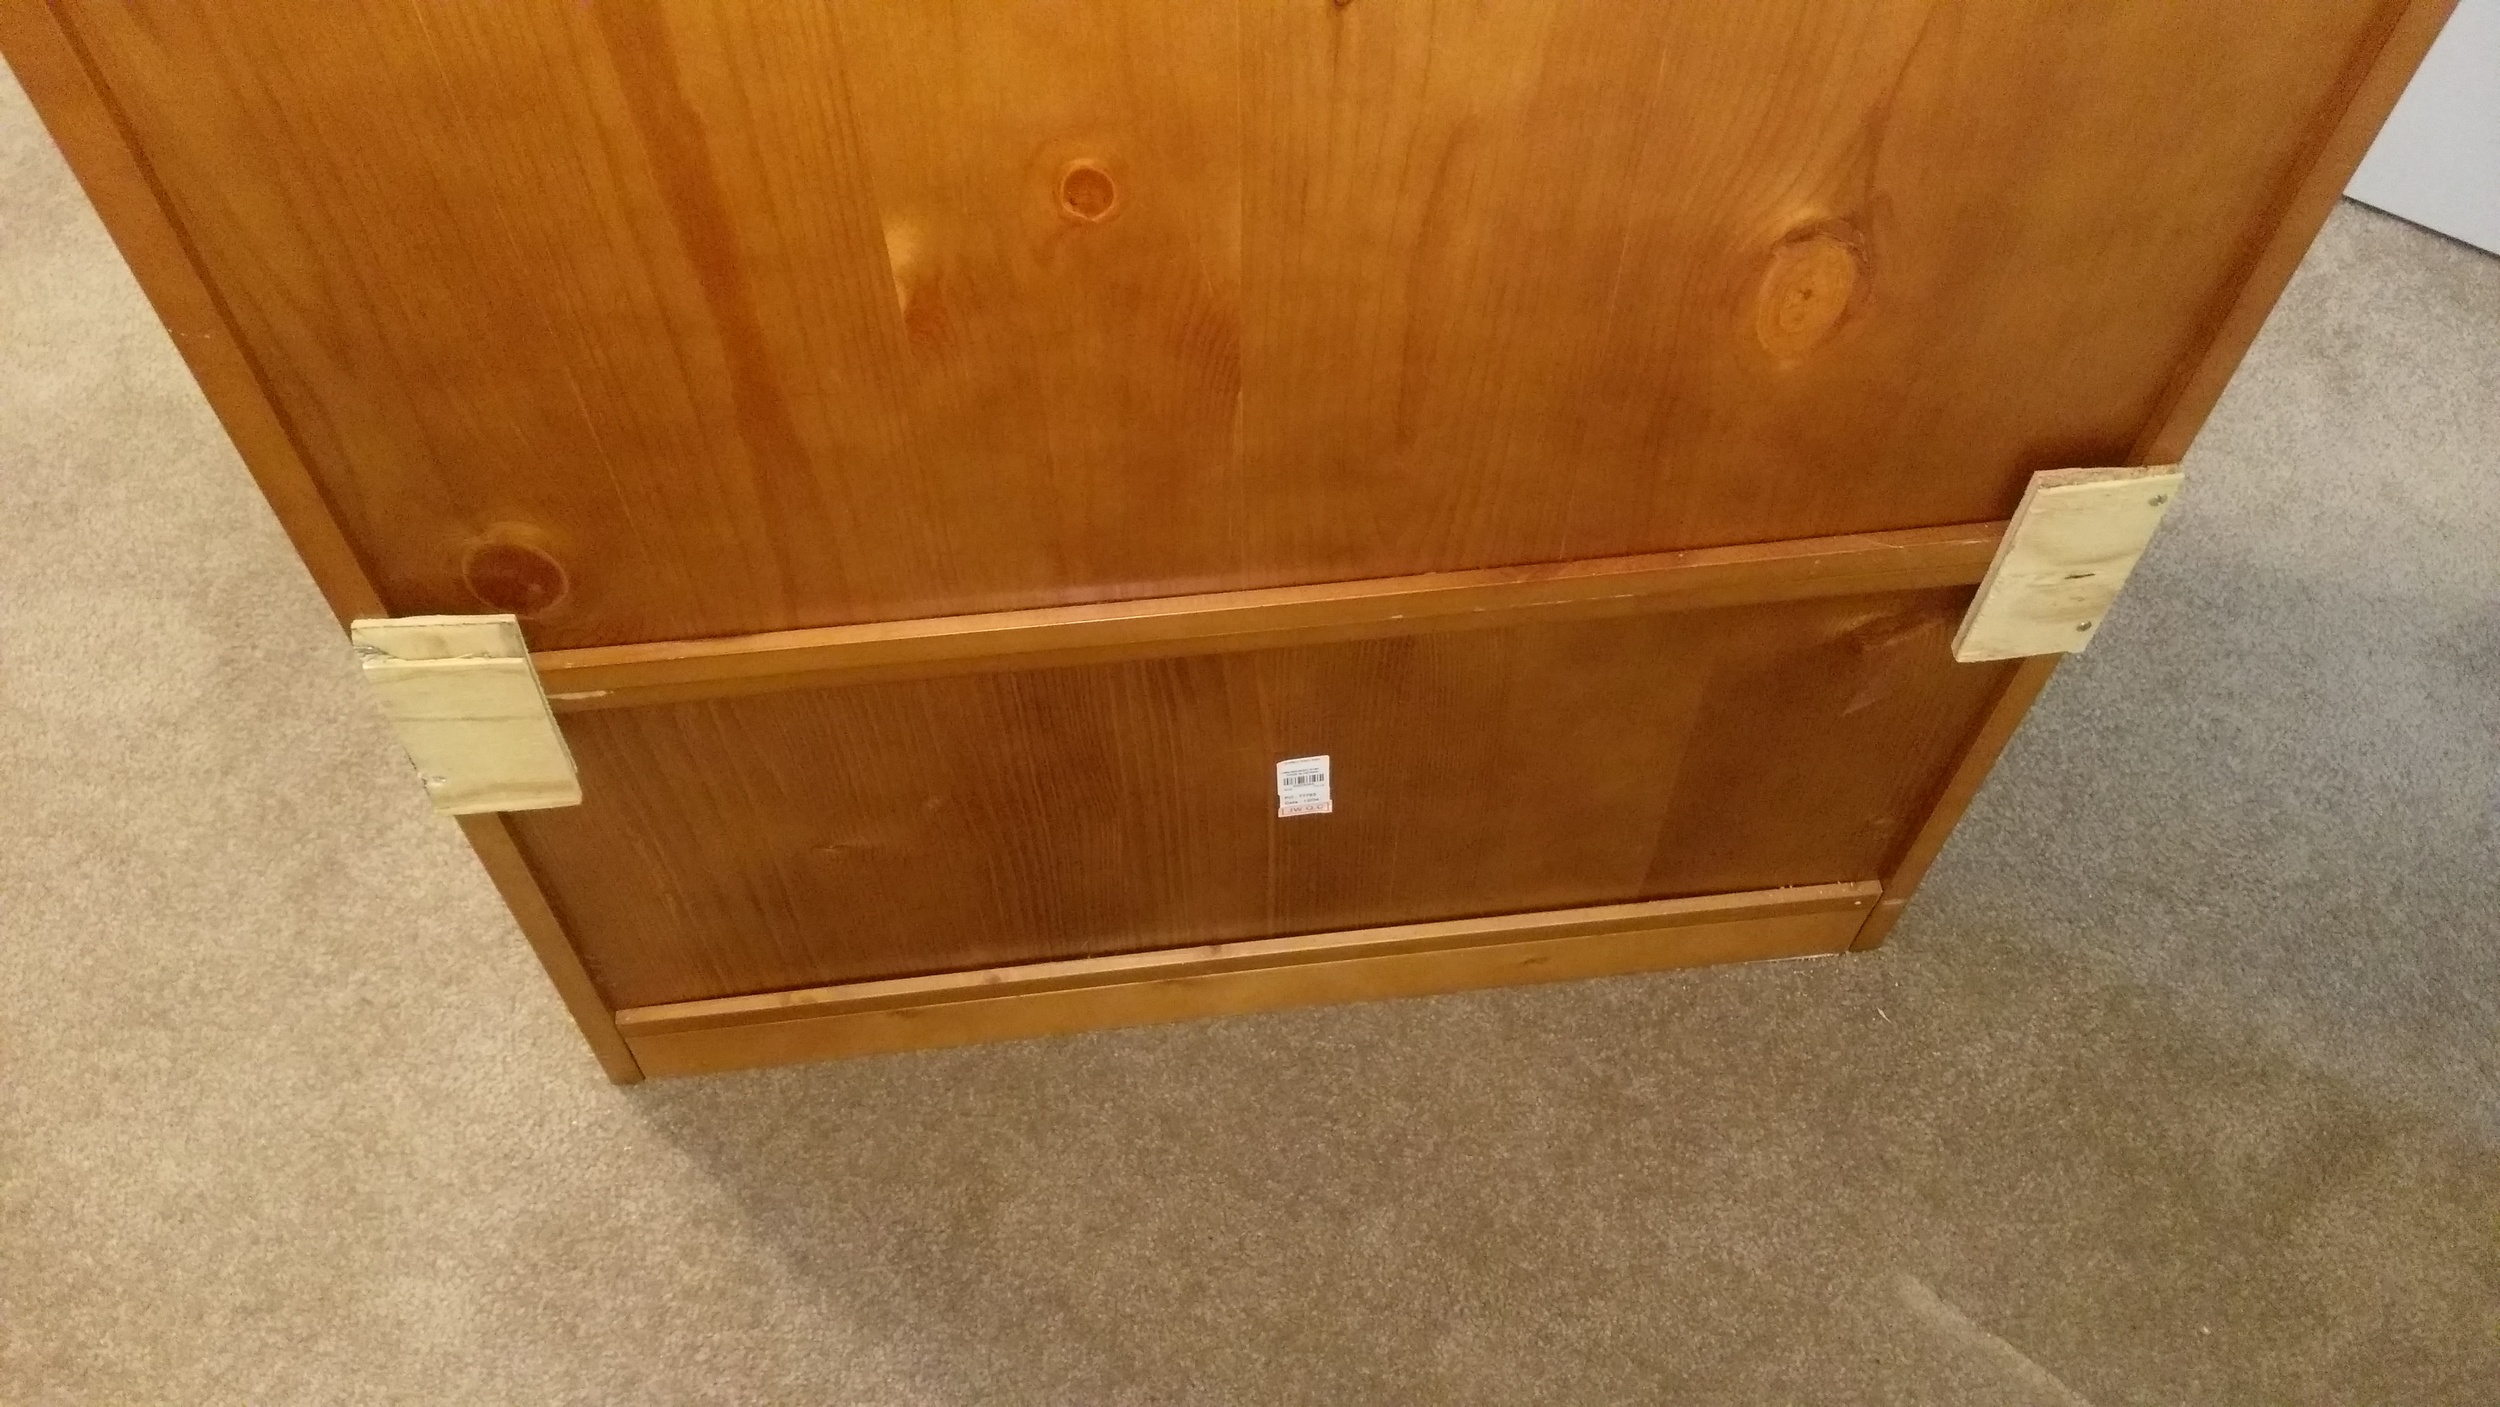
Another shot of the brackets
Smoke Detector
Not long after moving into our home (yep, I'm pulling out some projects from three years ago) the smoke detector on the main floor of the home started beeping like crazy. The plan was to simply replace the battery but when I got up around the detector I noticed that (1) the smoke detector was probably 25-35 thousand years old so it was a miracle we weren't dead already, and (2) the detector was powered directly by from the wiring in the house itself so there was no battery to change. I had to change the entire unit but I didn't want to go through the trouble of seeking out the exact smoke detector that would fit into the built-in brackets and outlet so I had to improvise.
What I did instead was purchase a 10-year life smoke detector that came with it's own mounting kit. Then I had to come up with a way to mount this sucker to the ceiling since the previous detector was essentially built into the ceiling and its removal left a big hole. The solution was a couple of screws and a piece of plywood. First, I mounted the piece of plywood into the ceiling where the old detector was mounted. Then, I installed the brackets for the new smoke detector on the newly mounted plywood and voilà, a newly mounted and operational smoke detector.

Plywood filling the hole

Completed installation
Garage Door Opener
Rizzo doesn't drive my car very often so when she does get the chance to back it out of the garage it is always an adventure. During one of these adventurous moments she got a bit to close to the garage door and managed to pull the garage door detector from the mounting and disconnect the wires. As a result, the garage door would not detect that it was safe to open or close the garage.
Luckily it wasn't the worst disaster ever to happen to a garage door. The mounting arm was intact, the most challenging part was repairing the wiring to connect the sensor with the garage door opener in order to complete the connection and get the machine to work. Seeing as I am Angus MacGyver I jumped right on the case to get to work.
First, I had to obtain some wire in order to repair the connection. A few years ago I was given my grandfather's toolboxes when he passed away. Pop never threw out anything so I started to dig and was able to find some wire perfectly suited for the job. From that point it was a matter of stripping the ends of the wire, connecting them between the sensor and the wire attached to the machine, and then taping up the exposed wiring. With just a few minutes of work, a some wire, a pair of wire cutters, and some electrical tape I fixed up the problem in about 10 minutes. I was quite proud of this fix.
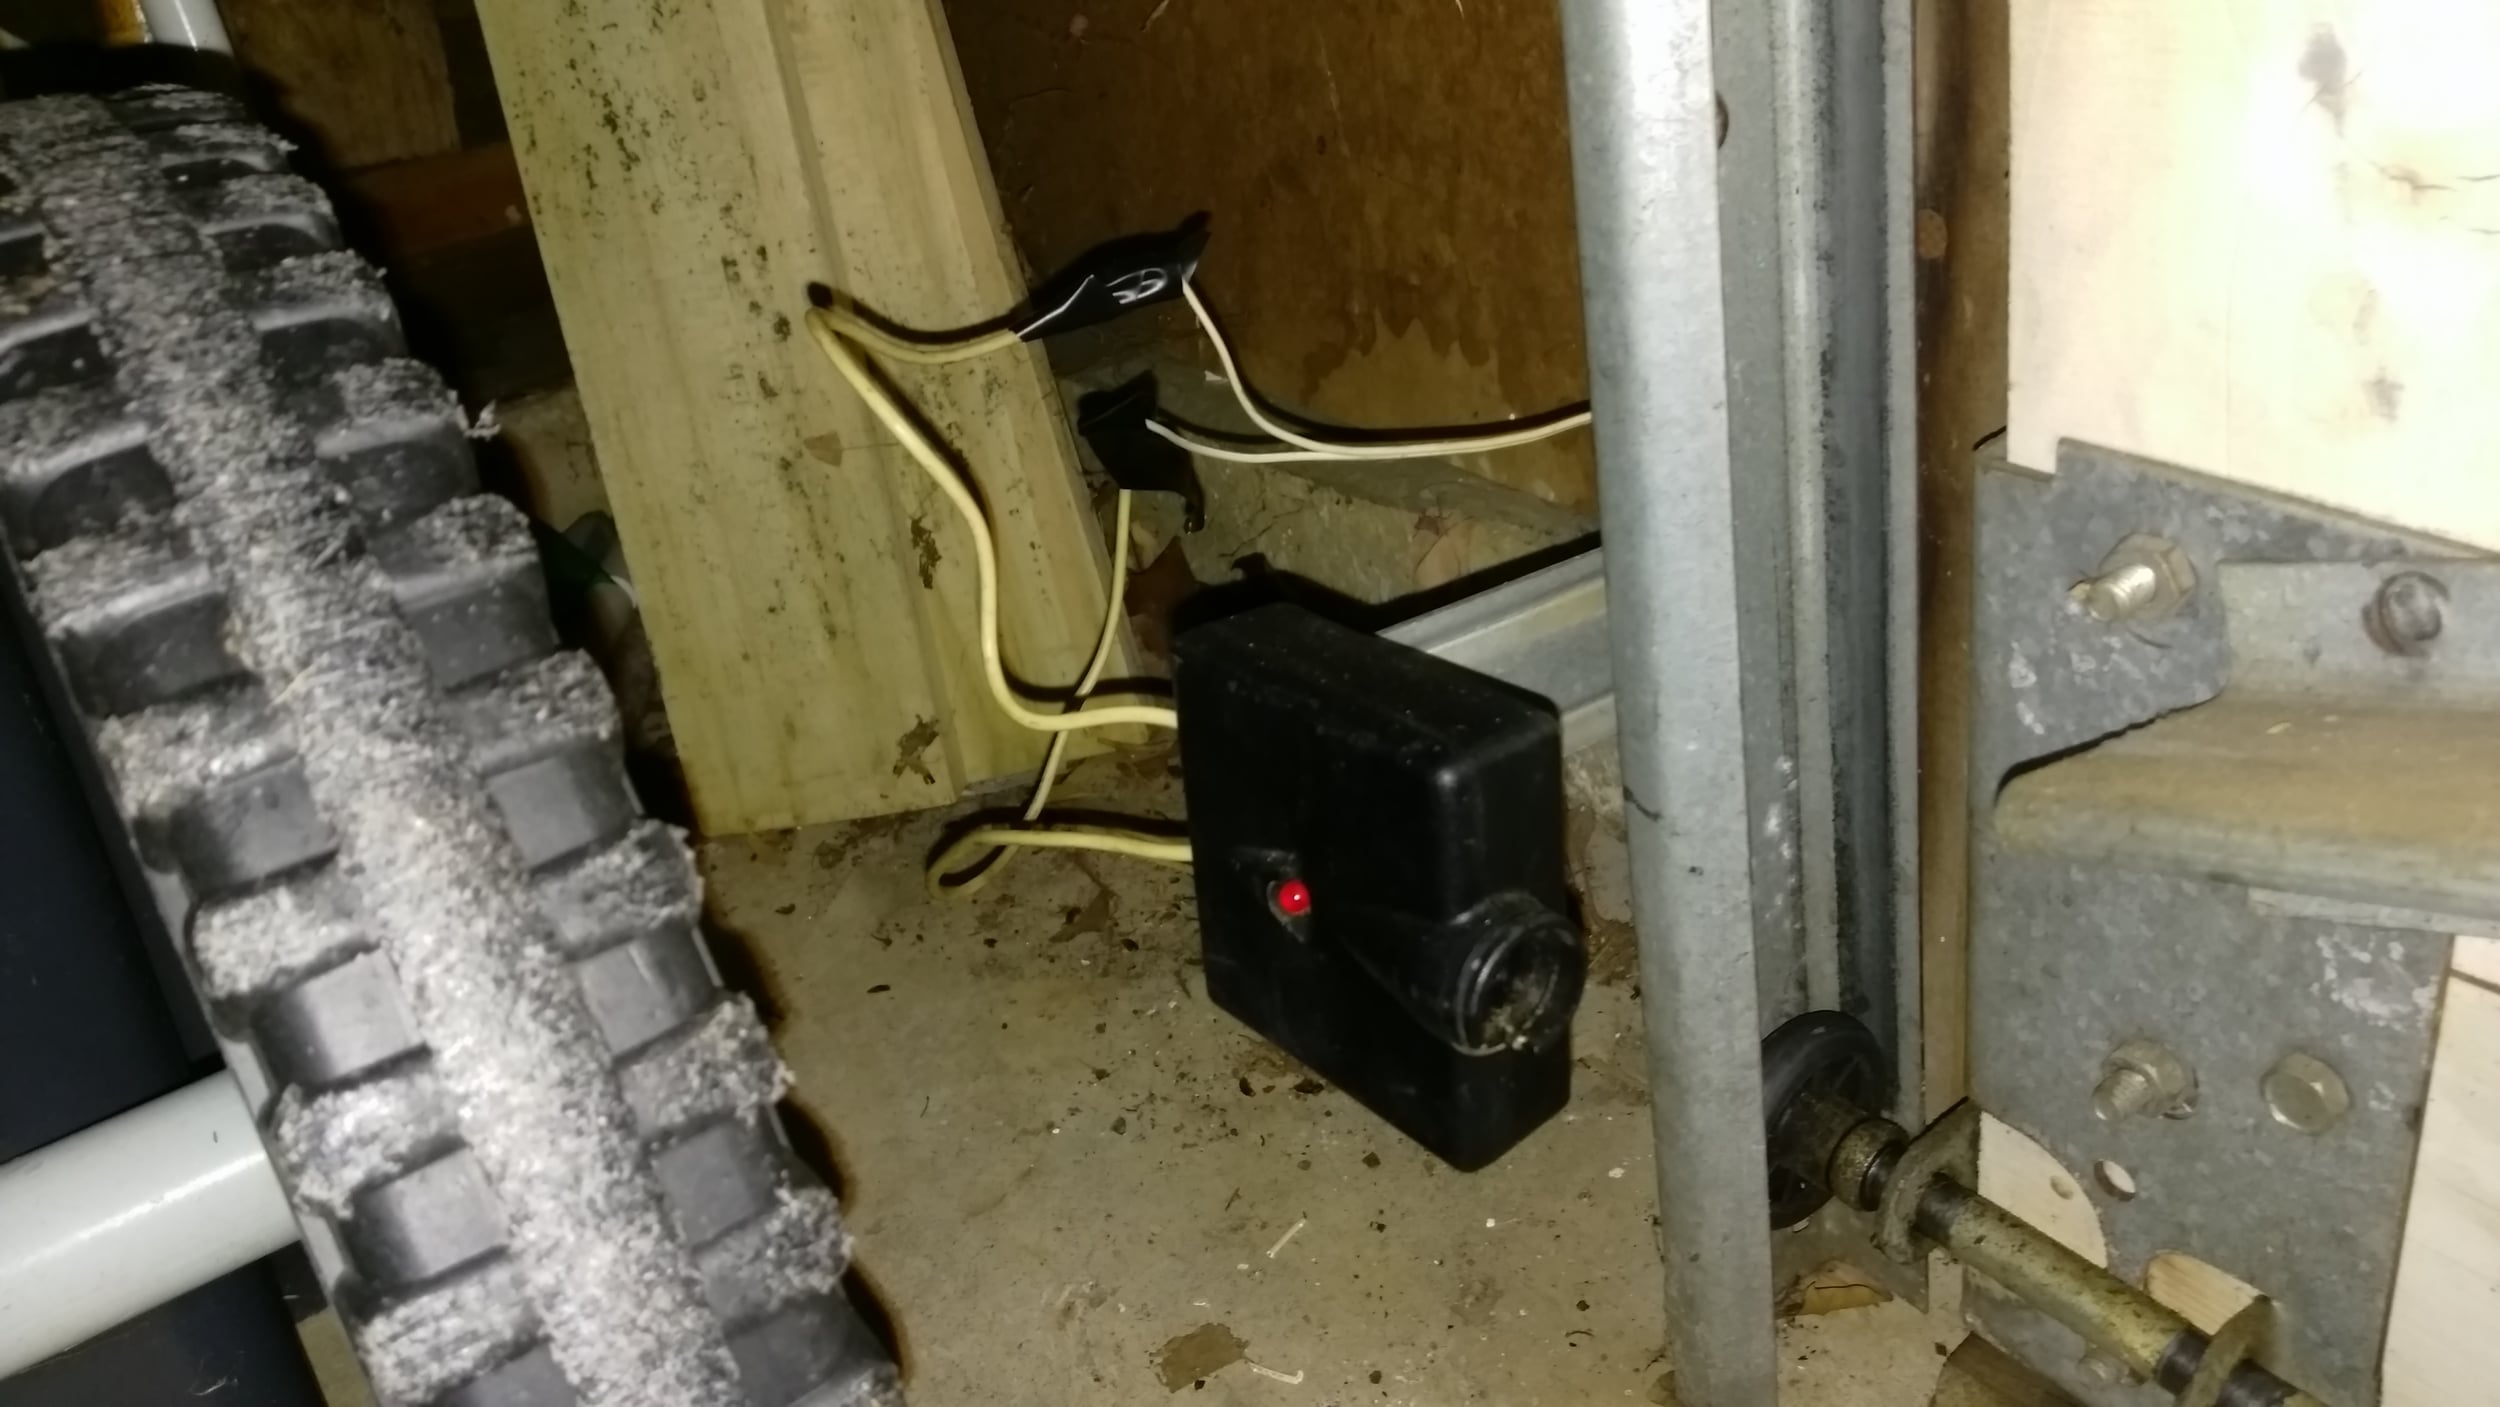
My fixed garage door sensor with some new wiring and electrical tape.
I'm certainly no Al Borland. I don't plan on taking on projects that could cause possibly cause more harm than good. But I don't mind picking up a hammer or a screw driver from time to time to give it a go. What's the worst that could happen? I mean, it's already broken, right?